As we get closer and closer to the epic feasts that are in the near future I can’t help but think of … the Christmas ham.
It’s become a bit of a tradition at my family’s Christmas table for me to prepare a ham from scratch using the best pork I can find, followed by the best split pea soup ever the following day.
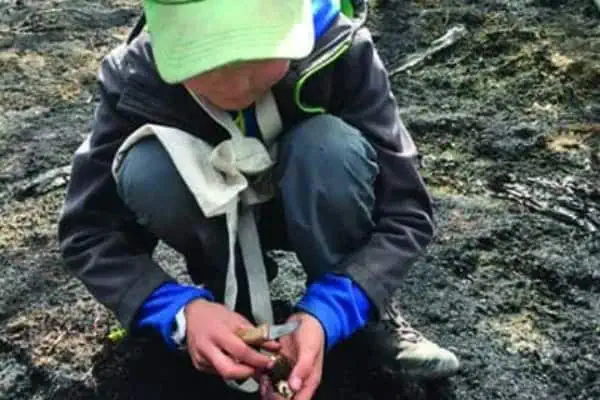
It started one year when I met up with Cheryl, a farmer from Oxford Station, Ontario to pick morel mushrooms.
Since the age of two, Cheryl was out with her dad collecting wild mushrooms or “moymoys” as she called them.
I grew up in a small town south of Prince George surrounded by forest and small farms. Growing up in a place where stands sprang up behind gas stations once a year to purchase mushrooms from the locals, you had to be crazy not to be out picking.
So the fate of fungus brought Cheryl and me together that spring day.
After a successful day of picking, we went back to the farmhouse to sip on Guinness, fry fresh morels and discuss her plans for the garden, animals and wine-making. I happened to be looking for a pork supplier. We started talking hogs, breeds and her raising methods.
As a big fan and supporter of farming rare breed animals, I was psyched to find out that she was raising Berkshires and Tamworths! It didn’t take me long to reserve one of her hogs for the fall.
Come fall I was committed. I rang home and informed everyone to expect a ham from me come Christmas.
But getting it to the dinner table from Ottawa to Valemont, BC meant a 4,000 km journey by plane and a 500 km drive into the mountains.
I had never really thought of how I was going to take it.
Mailing it just sounded wrong. My bags were already full and I had a cooler packed with pheasants, rabbits and various homemade charcuterie.
The only option left was my carry-on luggage. So, vacuum-packed and frozen, the ham went into the knapsack.
After some head-scratching, humming and hawing at security, I was allowed to fly with my ham safely stowed under my seat!
I found it equally amusing this year when my parents visited me here in Whitehorse and found out, the day they were leaving, a ham would accompany them on their flight.
The ham made it to the table and thus a new tradition was born.
The recipe
Making your own ham is rewarding and will result in a ham unlike any you can buy at the store.
And it’s not as difficult as you may think.
You don’t have to commit to doing a whole leg. Use a half-leg, or even a whole shoulder roast if you want.
The most important thing is to start with great pork. As the saying goes, “You can’t make a bad ham good, but you can make a good ham better.”
Using heritage-breed hogs such as Large Blacks, Tamworth, Berkshire and Duroc makes the most flavourful hams and ensures a future for those breeds.
Unfortunately, I don’t know of anyone in the Yukon who raises rare breed hogs, but I’d love to hear from anyone who’s considering it.
Holiday Glazed Ham
1 half-leg or shoulder free-range pork (4-5kg), on or off the bone
For the cure
2 kg salt
80 g curing salt #1 available at butcher shops or online (optional)
1 L apple cider
2 L Yukon Brewery espresso stout
4 L water
1.5 kg dark brown sugar
500 g molasses
20-30 juniper berries
30 g black peppercorns, crushed
10 bay leaves, crushed
10 cloves
To cook the ham
1 large onion, peeled and chopped
2 large carrots, peeled and chopped
2 celery sticks, chopped
10 black peppercorns
3-4 bay leaves
5-6 sprigs fresh thyme
1 small bunch parsley stalks
For the glaze
1 generous tbsp grainy mustard
100 g brown sugar
150 ml Yukon birch syrup
15-20 cloves (optional)
PREPARATION
Mix the cure ingredients in a pot and bring to a boil. Cool completely to 3-4 degrees C.
Pour cure into a non-metallic tub (plastic or wood).
Weight your ham. Its need to be left in the cure for two days/kg. A 5-kg leg needs at least 10 days of curing.
Place ham in cure with a weight on top to keep it submerged at all times. (A plate with a large glass jar full of water, or similar weight, on top works well. Just make sure it’s clean!)
After the required time in the cure, hang the ham in a cool place (2-8 degrees C) for 2-3 days to dry and form a tacky layer for the smoke to stick to.
If you are not smoking the ham (not necessary, but provides a nice flavour), leave it to hang for about a week to mature, then proceed to cooking.
To smoke your ham, you’ll need a gentle fire and a cold day to maintain a constant cold smoke. Cold-smoke for about 8-12 hours with alder and birch (my preference) or any other hardwood you like. Leave to hang for at least a week after smoking.
To cook, soak the ham over night in cold water to draw out excess salt.
The following day place it in a pot, cover with water and cook for a hour on a very low simmer. Taste the water. If it’s quite salty, replace it with fresh water.
Return it to the simmer and add vegetables and aromatics. Cook till tender (about 3-5 hours), or until an instant-read thermometer reads 150-160F.
Carefully remove the ham. Remove skin. Using a knife, lightly slash the fat to allow some of the glaze into the meat. Mix the glaze together.
Paint glaze all over and place in a 350-400F oven. Repaint every 10 minutes till nicely glazed and sticky (about 30 minutes).
Tip: If you don’t have a cold smoker, use your upright water smoker or Bradley and smoke for a couple of hours a day over several days.
Jeffery Mickelson, a professional chef, wild food fanatic and “offal” good guy, shares his passion for cooking at http://nose2tail.blogspot.com. Questions about food? Write to: jefferymickelson@hotmail.com.