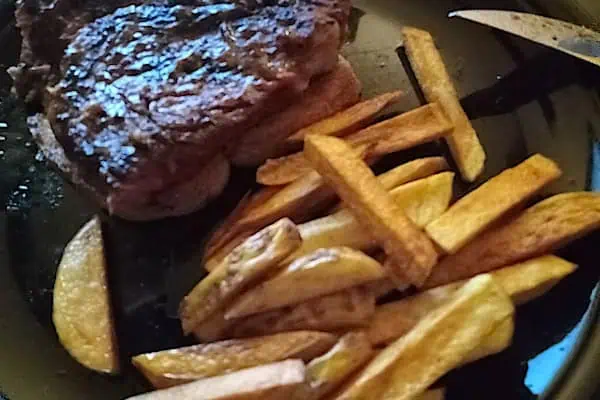
I do make the best chips this side of the Atlantic
That is not a lie, as anyone who has had my chips will attest to. I make chips, not fries. I can’t replicate these in a restaurant kitchen, either. And for that, I apologize to all the folks to whom I have fed the typical, bland, pasty, boring restaurant-style fries
You see, in a restaurant we are generally using frozen fries out of a plastic bag, deep-fried in some sort of oil that is usually changed out weekly—or more, depending on the volumes of the restaurant. In the kitchen, you try very hard never to cook meat in the deep fryer, as it breaks down the cooking oil but, in reality, sometimes you’re in a pinch and have to do up some bacon or chicken wings in a hurry. When that happens, your fries are compromised until you change out the oil.
At home, I have my chips pan. And I’ll take it over any air fryer or restaurant fries, every day.
I come from a very British family, and everyone we knew had a chips pan—my mom, my Nan and Granny, my aunties, all of my cousins—literally every house has or had a chips pan. When my wife and I moved in together, she took one look at mine and asked, “What is that disgusting thing?”
“It’s my chips pan! Wait and see.”
She was, needless to say, blown away and still enjoys my chips to this day, at least once or twice a week. The recipe’s not really difficult: it’s getting the pan seasoned that takes the time—literally years.
Start by using an enamel-coated saucepan. They work the best, and you’re going to invest quite a lot of time getting things right, so may as well start with the best.
Initially, you’re going to want to start with a 50:50 mixture of lard and shortening as your base. Don’t use oil because it breaks down, as previously mentioned. Every meal that you make, you add the drippings to your chips pan: bacon, eggs, sausages, pork, lamb, chicken, etc. If you have drippings, add them to your pan. Over time, the pan will become seasoned and the chips will taste fantastic.
At first, you’ll just be getting your usual standard-fare, pasty, restaurant-style fries, but as time goes on, you’ll start to see a real change in both the taste and texture of your chips—in a very good way! As things progress, you’ll notice that the pan ends up with a burnt layer on the outside. This is a good thing. It prevents things from getting too hot. Don’t ever clean out or wash your chips pan.
A few tips here. I only use russet potatoes. They work best. Peel them first, then slice them into chips. Slicing sounds simple, right? Not at all. Depending on how you slice them will determine your outcome. Smaller chips will cook faster and become crunchier. Larger chips will take more time and come out softer and chewier. Pick your preference on your cutting board.
These take about 15 minutes, start to finish, and make an awesome side for many pre-prepared meals such as M&M’s or frozen fish sticks. You can also make “chip butties” (butter two pieces of bread and fill with a layer of chips—heaven!).
SOME WORDS OF CAUTION
– Boiling a saucepan of lard and shortening can cause a fire if you do not fully pay attention to it. I have been doing this for decades but I still have a fire extinguisher in my kitchen. Do not leave your chips pan unattended, ever.
– Once the lard has fully melted, drop a chip in every minute or so to test the temperature. You’ll want to add all of the chips as soon as these “test” chips start to sizzle a little bit. It will bubble up a little at first, but as the chips cool the lard down, it will turn into a nice low boil.
– Do not overfill your pan with lard and shortening. Ideally, you’ll want it to be about 1/3 to 1/2 full, once the mixture has melted. As it evaporates and boils off, over time, add more lard and shortening in equal amounts.
– Do not overfill your pan with chips. Initially, the safest way to go is to put in fewer chips and then add more, as long as it’s safe to do so.
– Do not ever get any amount of water in your chips pan! Make sure that your hands are dry when you add the chips. Even the smallest drip or two of water will make for a very scary situation.


Homemade Chips
Ingredients
- Russet potatoes
- Chips pan
Instructions
- Peel your potatoes. I suggest 1 medium-sized potato per serving.
- Slice your potatoes into chips, remember that thinner is quicker and crunchier; thicker takes longer and is more chewy.
- Remove the lid and heat your pan on the highest setting of a large burner. Once the pan is sizzling some test chips, add the rest slowly, being careful to not overflow the pan.
- Use a chopstick to stir the chips. It’s important to keep them well-stirred so that they don’t stick together while cooking. Separation is the key here to fantastic chips.
- Once your desired done-ness is reached, use a metal slotted spoon to remove them from the pan and plate them.
- Be sure to move the pan to a cool space on your stovetop and put the lid back on it (so it stays dust-free until next time).


