December is at our front door. It is this wonderful—but wasteful—time of year again.
According to Zero Waste Canada, only 1 per cent of everything the average person buys is still in use six months after Christmas. The other 99 per cent has been discarded.
While unwrapping is part of the festive ritual, most wrapping materials are not recyclable and go straight into the trash bin. The organization reports that 545,000 tons of wrapping paper and gift bags are thrown out by Canadians every year over the Christmas season.
Say no to another busy Saturday of shopping in a crowded supermarket in Whitehorse and, instead, make your own Christmas decorations. Have fun doing it at home with friends, family or even solo! Here are some DIY (do it yourself) ideas to avoid buying anything new and plastic.
DIY Natural decorations
Dried berries, foraged sprigs, leaves, conifer foliage and branches, or even dried orange and beetroot slices bring beautiful colours and odours to your interior. To preserve your leaves, let them dry a couple of weeks in-between the pages of a heavy book, and then start decorating your home. Place your ornaments in glass jars, all over your place, for instance. Lots of content is available on Pinterest and YouTube for inspiration.
DIY Christmas wreath
On a sunny day, collect as much foliage as possible. The most-malleable pieces will be the easiest to work with. Take a wire coat hanger and shape it into a circle (it does not have to be perfect). Use the hook for hanging the wreath.
Then take the most-generous pieces of foliage and wrap them around your metal circle. You can secure them with twine, if necessary. Keep going by adding more greenery and building your wreath in this way. Other items, such as Christmas cards, can be added to make it more personal.
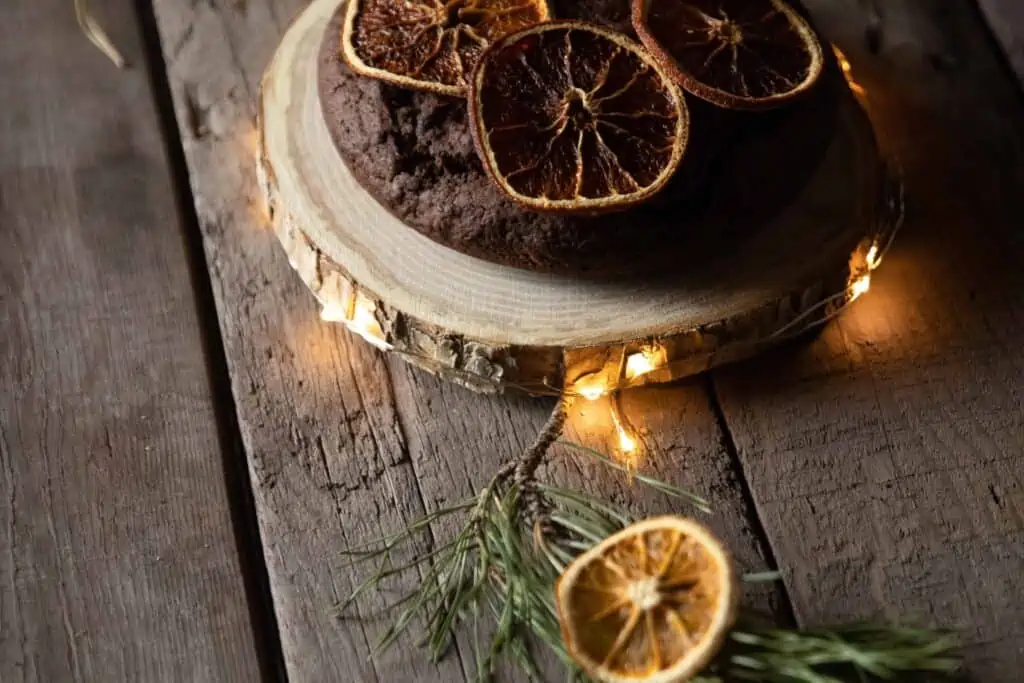
DIY edible garland
Make a colourful and fragrant garland with dried orange slices (or any sliced citrus fruit you have available), cinnamon sticks, pine cones, string and a yarn needle or a chopstick.
The dried oranges
Preheat your oven at 250℉. Slice the oranges thinly (1 orange will make a garland). Then, make a hole at the top of each slice, with a chopstick, dry them with a towel and display them on a wire rack. They are ready to go into the oven for about three hours. Make sure to flip them on regularly so they dry evenly. Remove from the oven and let them dry further for a couple of days.
The garland
Thread the string through the first slice (through the hole you made) and tie a knot. Repeat this process while leaving space (eight inches) between slices. You can tie cinnamon sticks or pine cones in-between slices.
DIY wrapping paper
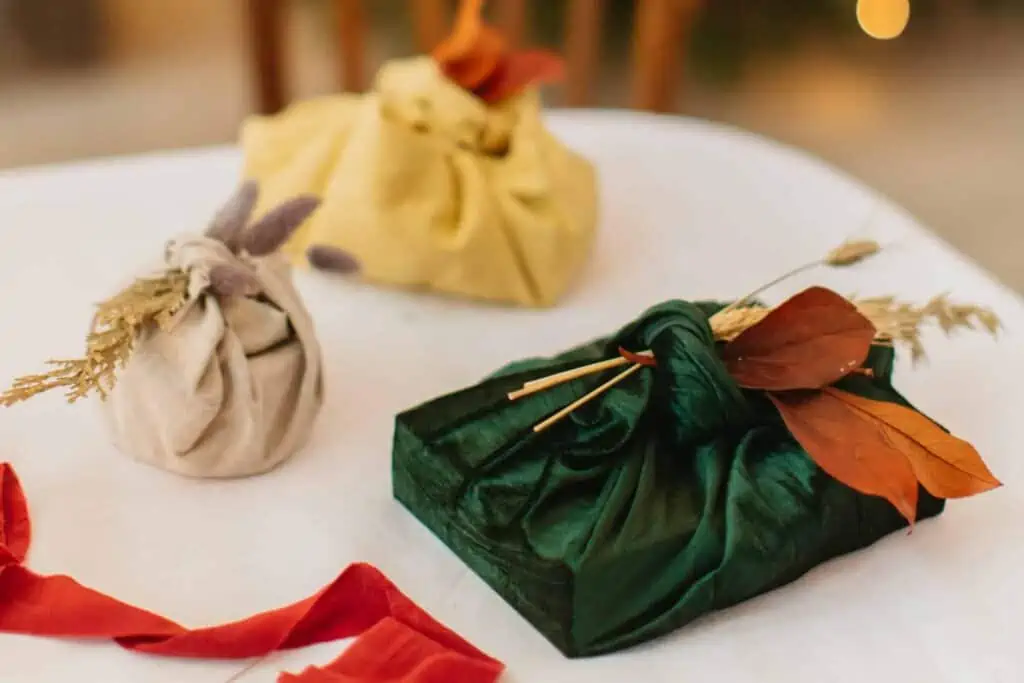
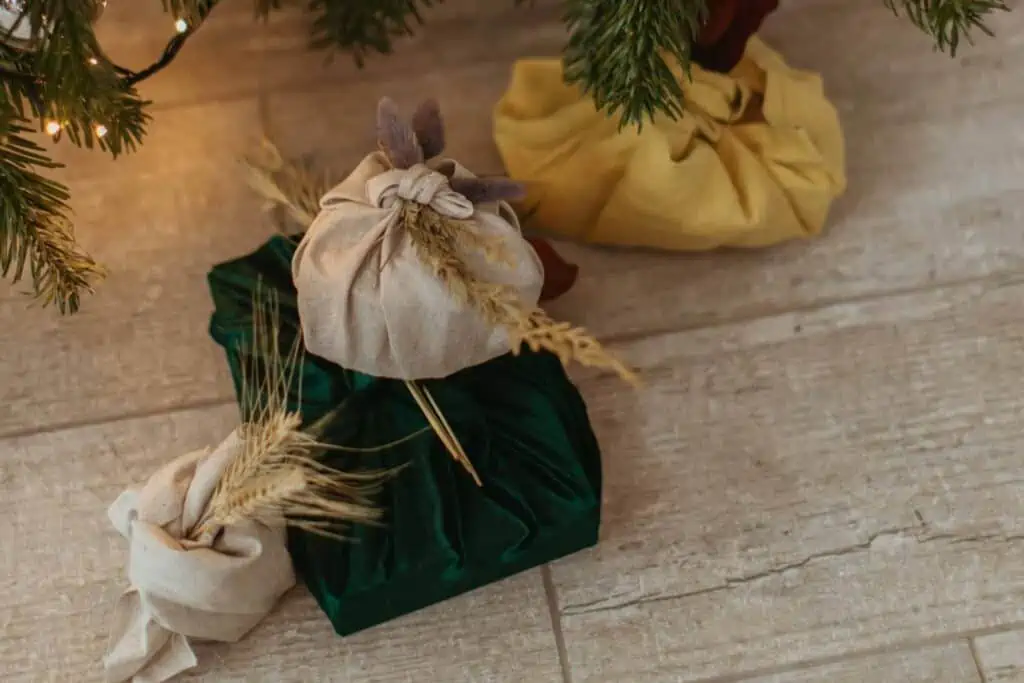
What about offering a two-in-one gift? Wrapping your present in a towel is beautiful, and the person who receives the gift can easily find a use for it.
Have you heard of Furoshiki (風呂敷)? Of Japanese origin, this “origami of fabric” is a folding technique used to wrap gifts. Use any pieces of fabric you have on hand (tote bags, tablecloths, T-shirts, etc.). You can work out how big you need it to be by placing the gift in the middle and bringing up all of the corners, together, making sure there’s enough fabric to tie. Videos are available online to learn how to tie.
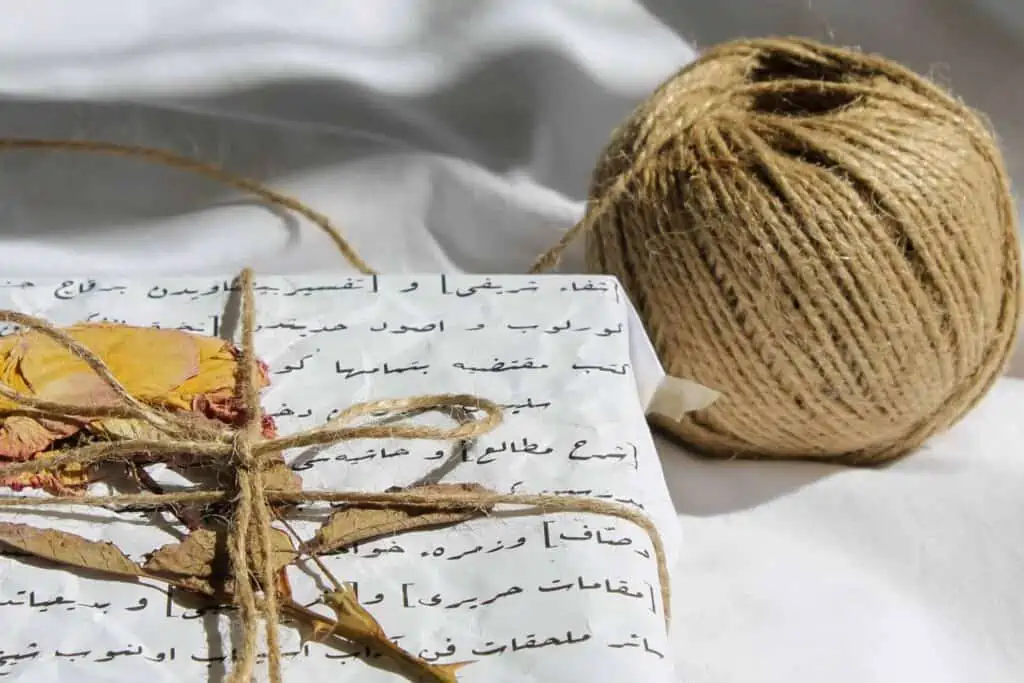
You can also reuse the paper you got from past presents or recycle your morning newspaper in a beautiful wrapping paper that is tied up with string to avoid using sticky tape.
Want to make your own wrapping paper from scratch? Get some recycled parcel paper and make your own print. You can use Pinterest to get inspiration and decide on the pattern you want. Make a stamp with a potato cut in half. Use a knife to carve out the shape you want in the potato. Lay out a sheet of paper, dry out your stamp and press it into some paint or ink before stamping (it is always a good idea to practice, a couple of times, on scrap paper). Let the paper dry before wrapping, and then tie your gift with a string or wool. You can add foraged leaves and branches for an extra-natural touch.
(A “lazy” but effective way to wrap is to put your gift into a reusable bag!)
DIY Christmas tree
Going one step further! The Christmas tree is (for most of us) the centerpiece of the celebration.
This year, if you don’t want to cut down your own tree, you could go rustic and tie wood sticks together, with the smallest size at the top and descending to bigger sizes farther down (perfect little stock of wood to start the fire with when festivities are over!). Decorate with red Christmas socks, branches, your homemade garland, etc. Beautiful illustrations of such homemade trees on Pinterest.